Getting started with C++ on Windows - Installation
02 Jul 2019So you want to start programming with C++ and you’re using Windows. Great! Microsoft’s reputation for incredible developer tools is well earned. We’re going to get set up with Microsoft Visual Studio (note that this is different than vscode), the Microsoft Visual C++ Compiler (MSVC), the CMake meta build system, vcpkg package manager, and Git version control. If you don’t know what some of that means, worry not! We’ll go step by step!
- Go to https://visualstudio.microsoft.com/ and download “Visual Studio 2019 - Community”. This will be our integrated development environment (IDE) for C++. Like Microsoft Word, but for code. The community edition is free for hobbyists.
- You should see a screen that resembles the following:
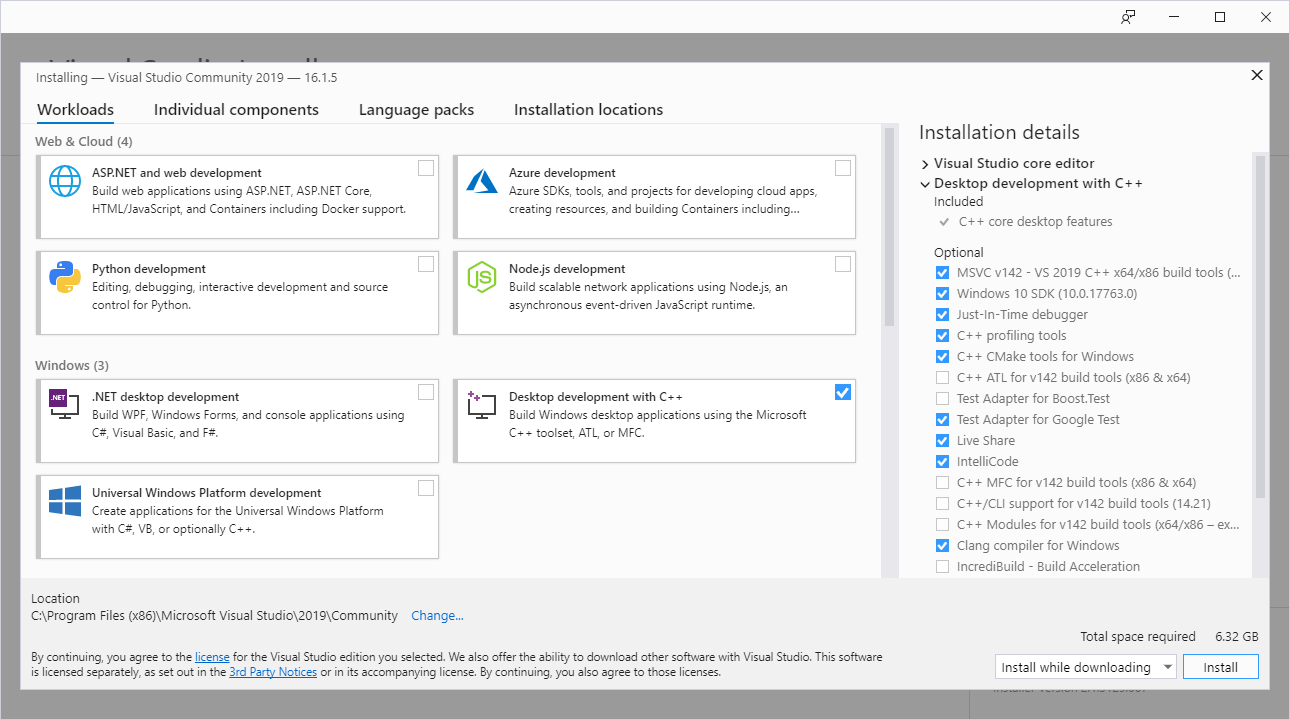
If you’re crunched for disk space, you can just select the following:
* "MSVC v142 - VS 2019 C++ x64/x86 build tools"
* "Windows 10 SDK"
* "C++ CMake tools for Windows"
Don’t worry if the versions aren’t exactly the same.
- Optionally, if you’re interested in programming for Linux or IoT, select the following:
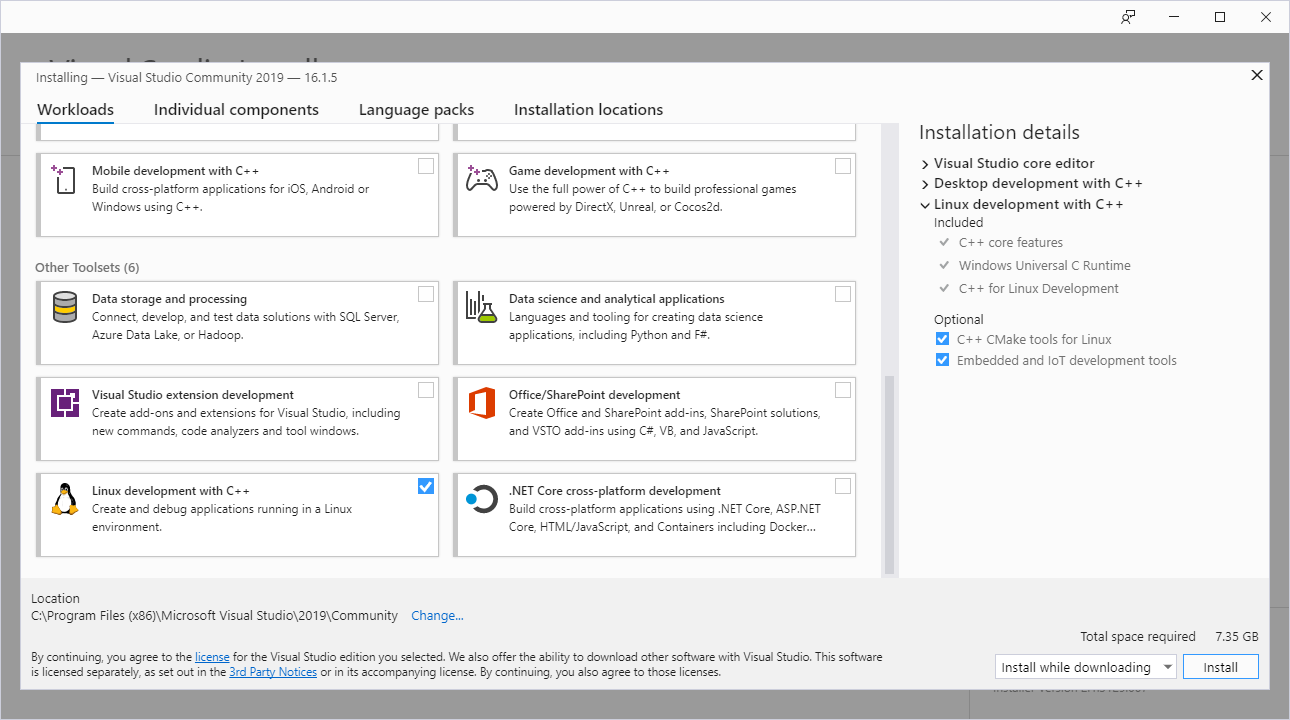
* "C++ CMake tools for Linux"
* "Embedded and IoT development tools"
-
Click “Install” and buckle up–the download will take some time.
-
Install a git client (if you’re already familiar with git, a client is not necessary). Git is a popular “source control” program that helps developers track revisions of the code they make, collaborate, and keep backups. Here are some popular options that are free for hobbyists:
Standard installation options for any of these should be fine.
-
Clone the vcpkg repository using your git client. This is a “package manager”–it will install useful libraries that will let us do more with less code. Open the clone menu for your git client, and provide the following link: https://github.com/microsoft/vcpkg.git.
- GitKraken:
- Click “File”
- Click “Clone”
- Click “Clone with URL”
- Paste the vcpkg link in “URL”
- Click “Clone the repo!”
- Source Tree:
- Click “Clone/New”
- Click “Clone Repository”
- Paste the vcpkg link in “Source Path / URL”
- Click “Clone”
- SmartGit:
- Click “Project”
- Click “Clone…”
- Paste the vcpkg link in “Repository URL:”
- Click “Select”
- Click “Next”
- Click “Finish”
- GitKraken:
Note the path of the directory vcpkg was cloned to.
-
Launch the command prompt. You can do this by right clicking the start menu, selecting “Run”, typing “cmd”, and clicking “OK”.
-
In your cmd, type
cd "<path-to-vcpkg>", where<path-to-vcpkg>is the directory you cloned vcpkg to. -
In your cmd, run
.\bootstrap-vcpkg.bat -
In your cmd, run
.\vcpkg integrate install -
In your cmd, run
.\vcpkg install gtest:x64-windowsWe have just installed our first package–Google’s very own unit testing framework! -
Create a folder to put your C++ project in. I’ll name mine “main”.
-
In your “main” folder, create a file named “CMakeLists.txt” with the following contents:
cmake_minimum_required(VERSION 3.5)
project(main)
add_executable(main main.cpp)- In your “main” folder, create a file named “main.cpp” with the following contents:
#include <cstdio>


int main()
{
    std::puts("Hello, world!");
    return 0;
}-
Open Visual Studio, and select “File” -> “Open CMake…” ->
<select your main folder> -
In Visual Studio, click on the Configuration drop-down in the main toolbar and choose “Manage Configurations…”

-
In “CMake toolchain file:”, paste
<vcpkg-clone-dir>/scripts/buildsystems/vcpkg.cmake -
Click on the Play button at the top of the page. You should see a console window containing the text “Hello, world!”);